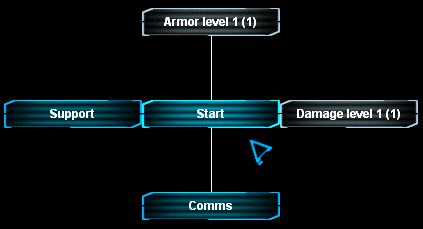
In either game mode, activate your pop-up menu by holding your right mouse button (default setting). Releasing the button over an icon chooses that option. You can bind all commands on the pop-up menu to keys in the control menu. The pop-up menus for both game modes look a little different:
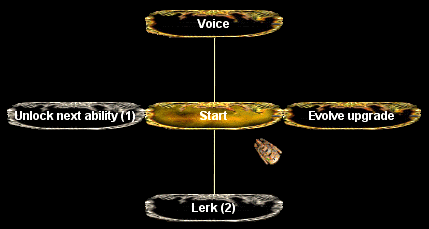
In Combat game mode, the pop-up menu is where you can increase your level and purchase upgrades. It also allows quick communication with your teammates.
| Marine Menu (CO) |
|---|

| Alien Menu (CO) |
|---|
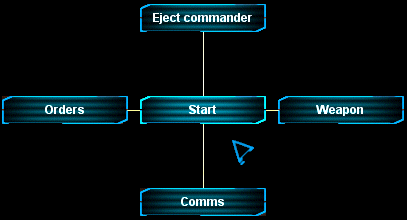
In NS mode, the marines use the pop-up menu for quick and efficient communication between squads and their commander--asking for orders, urgent equipment requests, or reporting combat conditions. When you use the pop-up menu for these purposes, the message (like "need health!" or "enemy spotted!") appears on the commander's interface, with an icon at your location. He knows who it's from, and exactly where you are.
| Marine Menu (NS) |
|---|
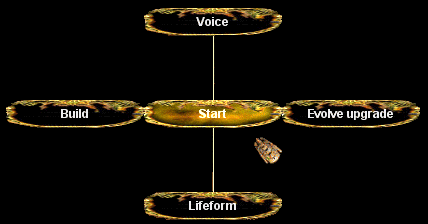
The Kharaa also use their pop-up menu to communicate with teammates (see "Hive Sight"); but it's mainly used to spend resources--to build, evolve new abilities, and change species (see the Kharaa sections below for more info.).
| Alien Menu (NS) |
|---|
In Combat mode you get experience for kills, and you spend it to improve yourself. There are no team points, or resources to gather.
You get experience for killing the enemy, or attacking their base. As your experience increases, you gain levels – which can be spent on upgrades (see the next section), and determine your rank. Your rank reflects your overall experience score. You can see the rank of everyone on both teams by hitting the TAB key (default). Your current experience is also drawn at the bottom of the your HUD, along with your current level and rank.
This table shows the amount of experience required to gain new levels, along with rank names:
| Combat Experience Ranks | |||
|---|---|---|---|
| LEVEL NUMBER | EXPERIENCE REQUIRED | MARINE NAME | ALIEN NAME |
| 1 | -- | Private | Hatchling |
| 2 | Private First Class | Xenoform | |
| 3 | Corporal | Minion | |
| 4 | Sergeant | Ambusher | |
| 5 | Lieutenant | Attacker | |
| 6 | Captain | Rampager | |
| 7 | Commander | Slaughterer | |
| 8 | Major | Eliminator | |
| 9 | Field Marshal | Nightmare | |
| 10 | General | Behemoth | |
The tougher the opponent, the more experience they are worth--as shown here:
| Experience per kill | ||||
|---|---|---|---|---|
| ENEMY'S LEVEL | POINTS GAINED | ENEMY'S LEVEL | POINTS GAINED | |
| Level 1 | Level 6 | |||
| Level 2 | Level 7 | |||
| Level 3 | Level 8 | |||
| Level 4 | Level 9 | |||
| Level 5 | Level 10 | |||
Extra cumulative experience is awarded when friendly players are nearby. For
each friend that's nearby when a kill is made, the experience awarded is
increased by
(
Another way to look at it: a group of five players making five level 1 kills
(one per person), would have
Besides killing enemy players, there is one other way to get experience: attacking objectives. As a player inflicts damage on the enemy hive or command station, that player gains experience. This experience is not shared with nearby players.
In Combat mode, every time you gain a level you can purchase a new upgrade. As your rank increases (see above), you'll have access to more and more powerful upgrades. Unlike NS game mode, upgrades are permanent -- they are not lost when you die and respawn. Levels can be spent at any time, and unspent levels are also not lost when dying and respawning.
Upgrades are purchased using the Pop-Up Menu (see above). The following are the upgrade paths for marines and aliens:
| Marine Upgrades |
|---|
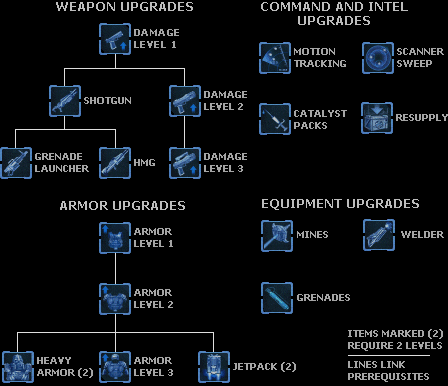
For descriptions, see the "Marine Technology & Upgrades" section, below.
| Alien Upgrades |
|---|
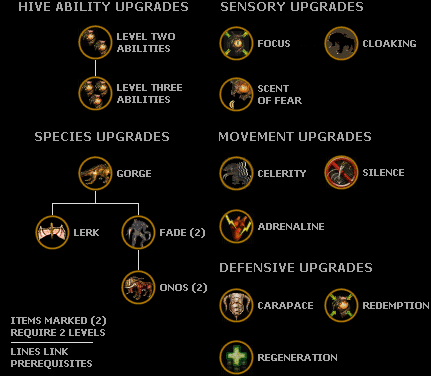
Notes on alien upgrades:
Change Species -- you begin play as a skulk, and can choose to change into four different and unique species. See "Alien Species" for descriptions.
Unlock Hive Ability -- there are four levels of abilities: Hive 0, Hive 1, Hive 2, and Hive 3. In Combat mode, you always have Hive 0 and Hive 1 abilities. The upgrade gives you access to Hive 2, and Hive 3 abilities, regardless of your species. See "Alien abilities" for more info.
Evolve Ability -- gain enough experience, and you can evolve all these abilities. See "Alien Evolutions."
See "Marine Upgrades", above, to learn how marines resupply in Combat game mode.
Frontiersmen can get health and ammo two ways -- from an armory (see Marine Structures), or from health or ammo packs.
The armory replenishes the ammo and health of anyone "using" it ("use" key's default setting: "e").
Health and ammo packs can be dropped by the commander anywhere, anytime. A skilled commander can keep his soldiers alive and fighting in the fiercest of battles.
| Ammo and Health Items | |
|---|---|
 |
HEALTH PACK :: Adds up to Cost: |
 |
AMMO PACK :: Adds one clip worth of
ammunition to the marine's inventory. Automatically transforms itself into
the appropriate ammunition type for the currently selected weapon. Only
picked up if the marine can hold more and the weapon requires ammunition
for use. Cost: |
 |
CATALYST PACK :: Boosts the metabolism of a
marine. The marine gains a Cost: Duration: |
Since the Kharaa's weapons are biological, they don't have to worry about ammo. They do have to watch their energy bar, however (see "HUD") -- when it's depleted they are too tired to attack (though they can still run). Standing still replenishes energy. The adrenaline evolution, or standing next to a movement chamber increases how quickly energy replenishes.
Kharaa are healed by standing next to a hive, or if a gorge gives them a hit of healing spray. Also, the defensive evolution regeneration allows an alien to heal itself. Finally, the fade's metabolize ability can heal its wounds. Healing restores health first, then armor.
Since the Kharaa's weapons are biological, they don't have to worry about ammo. They do have to watch their energy bar, however (see "HUD") -- when it's depleted they are too tired to attack (though they can still run). Standing still replenishes energy. The adrenaline evolution, or standing next to a movement chamber increases how quickly energy replenishes.
Kharaa are healed by standing next to a hive or defense chamber, or if a gorge gives them a hit of healing spray. Also, the defensive evolution regeneration allows an alien to heal itself. Finally, the fade's metabolize ability can heal its wounds. Healing restores health first, then armor.
Marines begin play with an LMG (Light Machine Gun), pistol, and knife; and standard armor.
You have four weapon slots:
Slot 1: Your primary weapon. You can only have one Slot 1 weapon at a
time.
Slots 2 & 3: Your trusty pistol and knife. Don't underestimate
their usefulness.
Slot 4: You can potentially have all three Slot 4 weapons
at the same time.
The following list describes the weapons and equipment available to marines. See the "Marine Pop-Up Menu (CO)" and "Experience (CO)" sections for more information on acquiring experience points and spending levels in Combat mode. All weapons, armor, and equipment are permanent when purchased. They are not lost when dying and respawning. Note that the "Cost" and "Requires" fields do not apply to Combat mode.
Your commander can equip you with new weapons and gear by researching the appropriate tech (which costs resource points) and then dropping a new weapon for you (which also costs). See the "Tech Tree" section for more info on researching. When you are killed, any weapons you've been given are dropped -- and if a marine doesn't pick them up, they vanish. In NS game mode, all equipment and armor is lost when respawning.
Here's a list of the marine weapons and gear:
| Marine Weapons -- Slot 1 | |||||||
|---|---|---|---|---|---|---|---|
 |
LIGHT MACHINE GUN :: Default weapon. Fair
damage and range. Versatile and effective, more so in groups. Marines
spawn with
| ||||||
 |
SHOTGUN :: Deadly at close range. Fires
| ||||||
 |
HEAVY MACHINE GUN :: Not as accurate as the
Machine Gun, but twice the punch and a bigger clip.
| ||||||
 |
GRENADE LAUNCHER :: Used for groups of
enemies or structures. Grenades explode on contact with an enemy or after
| ||||||
| Marine Weapons -- Slot 2 | |||||||
 |
PISTOL :: Default secondary weapon. Good
accuracy and power, small clip. Marines spawn with
| ||||||
| Marine Weapons -- Slot 3 | |||||||
 |
KNIFE :: Last ditch weapon when marines run
out of ammo or want to conserve it.
| ||||||
| Marine Weapons -- Slot 4 | |||||||
 |
| ||||||
 |
HAND GRENADE :: You only get one grenade, so
make it count. They take
| ||||||
 |
MINES :: Mines affix to any surface, and
explode on contact with an enemy or after absorbing
| ||||||
| Marine Armor and Equipment | |||||||
 |
HEAVY ARMOR :: Raises the armor of a marine
to Cost: | ||||||
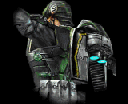 |
JETPACK :: Allows sustained flight, until the
energy meter hits zero. Must land to recharge. Handy for avoiding fangs
and claws. Can't be worn with Heavy Armor. Cost: | ||||||
An "upgrade" is the catch-all name for anything marines can purchase with levels they gain through experience. See the "Experience (CO)" section to learn more. The "Marine Upgrade Path" (above) describes the order in which upgrades can be purchased.
Note on "Auto-Commander": these upgrades are unique to Combat game mode, and act like an automated version of the NS game mode commander.
| COMBAT MODE MARINE UPGRADES | |
|---|---|
| DAMAGE UPGRADES :: Three levels of upgrade
that provide | |
| ARMOR UPGRADES :: Three levels of upgrade
that give a | |
| MOTION TRACKING :: This upgrade reveals all enemy movement, anywhere on the battlefield, as "blips" automatically displayed on your HUD. | |
| WEAPONS AND EQUIPMENT :: In Combat mode, new weapons and gear are purchased as upgrades, and become permanent additions to your arsenal. See "Marine Weapons and Equipment," above, for descriptions and details. All items in the "List of Weapons and Equipment" are available. The "Experience (CO)" section explains the order in which these upgrades can be purchased. | |
| AUTO-COMMANDER UPGRADES | |
| RESUPPLY :: When you have less than | |
| SCANNER SWEEP :: If there is a cloaked enemy nearby, there's a chance that the Auto-Commander will scan the area around you, forcing any hidden players to uncloak. | |
| CATALYST PACKS :: If, after making a kill, the Auto-Commander decides you are a competent fighter, it may drop a catalyst pack on you as a reward -- temporarily increasing your speed and rate-of-fire (see "Ammo and Health", above). | |
In NS game mode, the commander can research the following upgrades that automatically affect all marines, or that allow for new structures and weapons (see also "Tech Tree").
| ARMS LAB UPGRADES | |||||
|---|---|---|---|---|---|
| DAMAGE UPGRADES :: Three levels of upgrade
that provide Cost: Research time: | |||||
| ARMOR UPGRADES :: Three levels of upgrade
that give a Cost: Research time: | |||||
| CATALYST PACKS :: This technology allows the
commander to drop catalyst packs anywhere on the map. These packs boost
movement speed and weapon rate-of-fire by Cost: Research time: | |||||
| TECH LAB UPGRADES | |||||
| JETPACK TECH :: Once researched, this
technology allows jetpacks to be constructed within Cost: Research time: | |||||
| HEAVY TECH :: This technology is required
before heavy armor can be purchased. Once complete, heavy armor can be
constructed within Cost: Research time: | |||||
| OBSERVATORY UPGRADES | |||||
| MOTION TRACKING :: This upgrade reveals all
enemy movement, anywhere on the battlefield, as "blips" automatically
displayed on the marine HUD. The Kharaa can counter
this effect by standing still, or staying close to sensory
chambers. Cost: Research time: | |||||
| DISTRESS BEACON :: The distress beacon is the
commander's last ditch SOS call for reinforcements. All marines, including
those waiting to respawn, appear in the marine start -- even if there are
no infantry portals left. Cost: Time to activate: | |||||
| PHASE TECH :: Phase
tech is a specialized nanite technology needed for the construction
of phase gates (see "Marine Structures"). Cost: Research time: | |||||
| ARMORY UPGRADES | |||||
| ADVANCED ARMORY :: The armory must be
upgraded to an advanced armory before heavy weapons can be purchased. When
complete, heavy machine guns and grenade launchers can be dropped within
Cost: Research time: | |||||
| HAND GRENADES :: After the commander has researched this technology, each marine
respawns with a single grenade in weapon slot 4. Useful for countering
lerks and destroying enemy buildings. Cost: Research time: | |||||
| TURRET FACTORY UPGRADES | |||||
| SIEGE UPGRADE :: Turret
factories must be be upgraded, before siege
cannons can be built. Once this upgrade completes, siege cannons
can be built within Cost: Research time: | |||||
ELECTRICAL DEFENSE :: An electric field that
protects turret factories and resource nodes by
shocking up to
| |||||
Researching new weapons and upgrades requires the building of structures. Structures also serve other functions -- see below. Structures are unique to the NS game mode, with the exception of the command console.
Your commander will place structures, but until you and your teammates build them, they won't do anything. To build, get within touching distance of the structure and hold down your "use" key ("e" default setting). You'll see a status bar around the structure, filling in as it is built (note: multiple marines can speed construction). When built, the structure will deploy -- usually with a particular sound and movement.
| Basic Marine Structures | |||||||
|---|---|---|---|---|---|---|---|
 |
COMMAND CONSOLE :: Allows one marine to
connect to the command network and take the role of commander. The marine team always starts with a single
command console. Cost: Build time: Health: | ||||||
 |
RESOURCE TOWER :: Allows the commander to tap a ship or base's raw nano-supplies. Can
only be constructed over resource nodes. Each tower
adds Cost: Build time: Health: | ||||||
 |
INFANTRY PORTAL :: Allows marines to respawn
after being killed. Infantry portals are the most
crucial structure to defend, second only to the command
console. Must be placed within Cost: Build time: Health: | ||||||
 |
ARMORY :: Dispenses "free" ammo for a
marine's active weapon, and allows weapon construction within Cost: Build time: Health: | ||||||
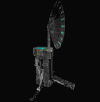 |
OBSERVATORY :: Reveals nearby enemies (even
when cloaked), allows scanner
sweeps, distress beacons, and research of motion tracking. Scanner
sweeps allow the commander to see cloaked aliens and structures in a
Cost: Build time: Health: | ||||||
 |
PHASE GATE :: Allows marines to teleport
instantly between any two gates. For more than two gates, the destination
is randomly determined. To use a phase gate, stand next to it and press
your "use" key ("e" default setting). Cost: Build time: Health: | ||||||
| RESEARCH STRUCTURES | |||||||
 |
ARMS LAB :: Taps local resources to allow
three levels of weapons and armor upgrades. Cost: Build time: Health: | ||||||
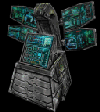 |
PROTOTYPE LAB :: Allows the research of
advanced, cutting edge technology -- namely jetpacks
and heavy armor. Cost: Build time: Health: | ||||||
| DEFENSIVE STRUCTURES | |||||||
 |
TURRET FACTORY :: Allows sentry turrets (automated gun emplacements) to be built
for base and perimeter defense. Turrets must be placed within Cost: Build time: Health: | ||||||
 |
SENTRY TURRET :: Automatically acquires the
nearest enemy target (players or chambers) and
fires. If its turret factory is destroyed, it ceases
to function.
| ||||||
 |
AUTOMATED SIEGE CANNON :: Automatically
acquires the nearest enemy structure (not player) it can "see" and focuses
a devastating blast at its location. The siege
cannon can fire through walls or obstacles at a range of up to
| ||||||
Marines begin play with an LMG (light machine gun), pistol, and knife; and standard armor. In NS mode, their commander can spend resources to unlock more powerful weapons and abilities, and build strategic structures. But limited resources force tough choices -- the commander must set priorities, and pick a path through the tech tree. For descriptions of structures, weapons, equipment and upgrades see above.
The Kharaa match human weapons and upgrades with 5 powerful alien species, and amazing evolutionary abilities.
There are five species of Kharaa -- and each has distinct abilities, strengths and limitations. In NS game mode you can change to any species you can afford, as often as you like. In Combat mode you must evolve according to the Alien Upgrade Path (see "Alien Upgrades (CO)" above).
While changing to a new lifeform you are encased in a gestation sac, and are totally defenseless for a number of seconds (see the "Gestation Egg" under "Alien Species". Higher lifeforms require a longer gestation. If you're found while gestating, you are an easy target, so find a place to hide or be sure you have friendly aliens to protect you. Your resources (NS) or level (CO) are spent as soon as you start gestating, so if you're killed before you complete, your investment is lost. The following table shows gestation times in seconds:
| Gestation Times | ||
|---|---|---|
| TARGET SPECIES | NS MODE TIME | COMBAT MODE TIME |
| Skulk | ||
| Gorge | ||
| Lerk | ||
| Fade | ||
| Onos | ||
When you change species, you keep the same percentage of health and armor (so if you're at half health before, you'll at half health after, etc.).
Hive abilities include alien attacks (like the skulk's bite), and other combat affects (like the fade's blink, or the lerk's primal scream). There are four levels of alien abilities: Hive 0, Hive 1, Hive 2, and Hive 3.
In Combat mode, you always have access to Hive 0 and Hive 1 abilities. You can spend levels to unlock access to Hive 2 and Hive 3 abilities (see the "Experience (CO)" section).
In NS game mode, Hive 0 abilities are always available. To access Hive 1, Hive 2, and Hive 3 abilities, your team needs to have that number of hives active. For example: Xenocide is the skulk's Hive 3 ability. Until the aliens get all three hives up, skulks won't be able to use it. Note: aliens start play with one hive, but they can lose it, and have zero. In those cases, they lose all but their Hive 0 abilities, and start taking damage. If they can't get one built fast, the game is over.
Each species and their abilities, are described below.
| Kharaa Species | |||||||||||||||||||||||||||||
|---|---|---|---|---|---|---|---|---|---|---|---|---|---|---|---|---|---|---|---|---|---|---|---|---|---|---|---|---|---|
 |
SKULK :: All players (re)spawn as skulks. Capable of blurring speed and leaps of near
limitless height, skulks are equally adept at combat and scouting. They
can run up walls and ceilings, and often ambush marines from unexpected
directions. Special Ability: Wall Running: Just look and run, and you can automatically climb any flat surface.
| ||||||||||||||||||||||||||||
| |||||||||||||||||||||||||||||
 |
GORGE :: Belligerent and obese, gorges serve mainly a support role -- though they can dish
out damage when they must. In NS game mode gorges are the only species
that can build. Special Ability: Build: (NS) Gorges can build chambers (including resource towers), and trigger the growth of new hives. Use the pop-up menu to choose what to build. Standing next to a chamber and holding down the "use" key (default "e") speeds building.
| ||||||||||||||||||||||||||||
| |||||||||||||||||||||||||||||
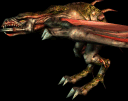 |
LERK :: Wiry, fast, and fierce, lerks attack on the wing -- harassing marine squads and
supporting other Kharaa. Low armor and health means they usually keep
their distance. Their vicious bite makes it a good idea for marines to, as
well. Special Ability: Flight: Tap your jump key to fly. Hold down to glide. Watch your energy bar!
| ||||||||||||||||||||||||||||
| |||||||||||||||||||||||||||||
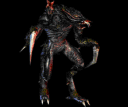 |
FADE :: The shocktroopers of the Kharaa,
fades can take and give heavy damage, up close and
at a distance. Their blink ability can be downright
spooky.
| ||||||||||||||||||||||||||||
| |||||||||||||||||||||||||||||
 |
ONOS :: The dreadnoughts of the Kharaa, the
onos are tanks -- highly armored and very powerful.
Only the best-equipped marine squads can hope to defeat them. If the onos
doesn't swallow them whole first.
| ||||||||||||||||||||||||||||
| |||||||||||||||||||||||||||||
 |
GESTATION EGG :: When gestating to a new species or
gaining a new evolution, the Kharaa surround
themselves with an organic "egg" sack. Eggs have little health/armor, so
choose carefully where you gestate. See "Changing Species" above, or
"Alien Evolutions" below. | ||||||||||||||||||||||||||||
Chambers are alien growths that gorges build for offense, defense, and tactical purposes. With the exception of the hive, they are unique to the NS game mode.
In NS mode, every active hive allows one kind of chamber to be built (with the exception of offensive chambers and resource chambers, which can always be built). Chambers are required to evolve (see section below). Only gorges can build them.
| BASIC CHAMBERS | |||||||
|---|---|---|---|---|---|---|---|
 |
HIVE :: The hive is the
most important alien growth. It is a large organism, that hangs from the
ceiling in special map locations. The Kharaa need a hive to spawn (see "Respawning," above). Any alien
standing within
| ||||||
 |
RESOURCE TOWER :: Draws resources from
resource nodes at rate of
| ||||||
 |
OFFENSE CHAMBER :: Attacks nearest enemy in
line-of-sight with deadly spikes.
| ||||||
| EVOLUTIONARY CHAMBERS | |||||||
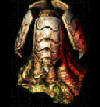 |
DEFENSE CHAMBER :: Automatically heals up to
| ||||||
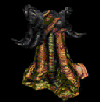 |
MOVEMENT CHAMBER :: Allows instant movement
to nearest hive, or hive under attack. Also regenerates the energy of up
to
| ||||||
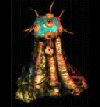 |
SENSORY CHAMBER :: Any marine in
line-of-sight of chamber is revealed on hive sight.
Blocks the marine motion tracking technology. Cloaks
aliens and chambers that have been within
| ||||||
Evolutions are advanced adaptive abilities that, when combined with different species, encourage a wide variety of play-styles. There are three categories of evolution: Defensive, Movement, and Sensory. Evolving a new ability requires gestation time -- during which you can see around you, but are helpless. Evolutions are purchased through your pop-up menu.
In Combat mode, you can spend a level to purchase any of the nine evolutions. A highly ranked alien could potentially evolve them all. See the "Experience (CO)" and "Levels (CO)" sections for more on spending levels.
Evolutions are all gained at maximum power. They persist when you change species, or even when you die and respawn.
In NS game mode, aliens must build chambers to get evolutions (see
"Chambers," above). Each hive allows for one kind of
chamber (Defense, Movement, or Sensory). Once a chamber is built, the
corresponding evolutions become available to all players. Players can choose one
evolution from each category. The number of chambers built determines the level
of the evolutions -- up to a max of three. Evolutions cost
Example of evolutions and chambers (NS): at the start of
the game, the Kharaa decide to go with Movement as their first type of
evolution. A gorge builds a movement chamber, and the
movement icon flashes on each player's screen. For
| DEFENSIVE EVOLUTIONS | ||||||
|---|---|---|---|---|---|---|
CARAPACE :: A damage-soaking lattice of
cartilage grows into the skin.
| ||||||
| REDEMPTION :: For every second spent near
death (below | ||||||
| REGENERATION :: Damage slowly heals, giving
back | ||||||
| MOVEMENT EVOLUTIONS | ||||||
| ADRENALINE :: Energy recharges | ||||||
| CELERITY :: Each level increases movement
speed, though some lifeforms gain more of an advantage then others. Also
affects in-air (flight) speed. Increases the alien's movement speed by
| ||||||
| SILENCE :: Movement and attacks are quieter
-- the volume drops to | ||||||
| SENSORY EVOLUTIONS | ||||||
| CLOAKING :: When standing still and not
attacking, the alien fades to near invisibility. The time required drops
with each level: | ||||||
| FOCUS :: Each level slows rate of fire by
| ||||||
| SCENT OF FEAR :: Nearby enemies show up on
hive sight (range increases with level: | ||||||
Hold your [TAB] key (default) to bring up the scoreboard.
The Combat mode scoreboard reflects ranking. See the "Experience (CO)" section.
In NS mode, players are scored based on their contributions to the team. Players get points for advancing their team's cause: including building structures, destroying enemy structures, and killing enemy players.
| THE NATURAL SELECTION SCORING SYSTEM | |||
|---|---|---|---|
| MARINE ACTION | REWARD | ALIEN ACTION | REWARD |
| Killing Skulk | Killing Marine | ||
| Killing Gorge | Killing Jetpack Marine | ||
| Killing Lerk | Killing Heavy Armor Marine | ||
| Killing Fade | Killing Sentry Turret | ||
| Killing Onos | Killing Automated Siege Cannon | ||
| Building Command Chair | Building Hive | ||
| Building Resource Tower | Building Resource Chamber | ||
| Building Other Marine Structure | Building Other Alien Structure | ||
Rules for Structures:
Killing a structure is worth the same amount of points as building
it.
Points are given to the gorge that placed the
structure, regardless of who helped.
The commander gets
all points for building, not marines (keeps them at the top of the
scoreboard).